#how to install wordpress in xampp
Explore tagged Tumblr posts
Visit Tumblr Blog
Explore Tumblr blogs with no restrictions, modern design and the best experience.
Last Seen Tumblr Blogs


Fun Fact
Kazakhstan’s Minister of Communications and Informatics has blocked the Tumblr site because it contained 60 sites of terrorism, extremism, and pornography in 2015.
Text
youtube
Learn how to install WordPress on localhost in XAMPP on Windows 10/11 with this easy tutorial. Follow the step-by-step guide for a successful setup!
1 note
·
View note
Text
How to Install
Looking for easy, step-by-step guides on how to install everything from software to home devices? Our "How to Install" blog provides clear, beginner-friendly instructions to help you get things up and running without the hassle. Whether you're setting up a new app, assembling tech gadgets, or configuring tools, we simplify the process for you. Each post is written with accuracy and user convenience in mind.
How to Install How to Install Printers Without CD How to Install Webcam Drivers How to Install SSH How to Install Pixelmon How to Install OptiFine How to Install Fabric How to Install Zend Framework with XAMPP on Windows How to Install Roblox on Chromebook How to Install Roblox Studio How to Install Firefox on Mac How to Install Firefox on Linux How to Install Firefox on Windows How to Install Java Step-by-Step Guide for Beginners How to Install Java on Mac Follow Full Process Ultimate Guide How to Install Java for Minecraft Easy Step Guide for How to Install VPN for Privacy How to Install VPN Server Virtual Private Network How to Install VPN on Router A Step-by-Step Guide : Complete Guide for How to Install Anaconda How to Install Anaconda on Linux Complete Guide How to Install Anaconda on Mac: A Step-by-Step Guide How to Install Anaconda on Ubuntu: A Step-by-Step Guide How to Install Anaconda on Windows How to Install npm A Step-by-Step Guide for Beginners How to Install npm on Ubuntu Step-by-Step How to Install NVM on Ubuntu Tips, and Explanations How to Install npm on Windows Solve Common Issues How to Install NVM on Windows Troubleshooting Tips How to Install npm on Visual Studio Code How to Install Node.js on Your Machine How to Install Node.js on Linux Step-by-Step Guide How to Install Node.js on Mac Step-by-Step Guide How to Install Node Modules on Angular How to Install Node.js on Ubuntu The Latest Version How to Install Node.js on Windows Get started Full Method How to Install APK File on Your Android Device Complete Guide on How to Install APK on Android TV How to Install APK on Chromebook Step by Step Process How to Install APK on iOS A Comprehensive Guide How to Install IPA on iPhone A Complete Guide How to Install APK on Windows 10 Complete Guide How to Install Git A Step-by-Step Guide for Beginners How to Install Git Bash A Complete Step-by-Step Guide How to Install Git on Visual Studio Code How to Install GitHub Simple Step-by-Step Process How to Install Git on Mac Step-by-Step Guide How to Install Git on Linux A Step-by-Step Guide How to Install Git on Ubuntu Step-by-Step Guide How to Install Git on Windows A Simple Guide How to Install Docker How to Install Docker on Linux How to Install Docker on Mac How to Install Docker Daemon Mac How to Install Docker on Ubuntu How to Install Docker Compose on Ubuntu 20.04 How to Install Docker Compose on Windows How to Install Docker on Windows How to Install WordPress How to Install WordPress on Ubuntu How to Install WordPress Plugins How to Install WordPress on Windows 10 How to Install Kodi on Firestick How to Install Exodus on Kodi How to Install The Crew on Kodi How to Install XAMPP on Mac
0 notes
Text
Complete PHP Tutorial: Learn PHP from Scratch in 7 Days
Are you looking to learn backend web development and build dynamic websites with real functionality? You’re in the right place. Welcome to the Complete PHP Tutorial: Learn PHP from Scratch in 7 Days — a practical, beginner-friendly guide designed to help you master the fundamentals of PHP in just one week.
PHP, or Hypertext Preprocessor, is one of the most widely used server-side scripting languages on the web. It powers everything from small blogs to large-scale websites like Facebook and WordPress. Learning PHP opens up the door to back-end development, content management systems, and full-stack programming. Whether you're a complete beginner or have some experience with HTML/CSS, this tutorial is structured to help you learn PHP step by step with real-world examples.
Why Learn PHP?
Before diving into the tutorial, let’s understand why PHP is still relevant and worth learning in 2025:
Beginner-friendly: Easy syntax and wide support.
Open-source: Free to use with strong community support.
Cross-platform: Runs on Windows, macOS, Linux, and integrates with most servers.
Database integration: Works seamlessly with MySQL and other databases.
In-demand: Still heavily used in CMS platforms like WordPress, Joomla, and Drupal.
If you want to build contact forms, login systems, e-commerce platforms, or data-driven applications, PHP is a great place to start.
Day-by-Day Breakdown: Learn PHP from Scratch in 7 Days
Day 1: Introduction to PHP & Setup
Start by setting up your environment:
Install XAMPP or MAMP to create a local server.
Create your first .php file.
Learn how to embed PHP inside HTML.
Example:
<?php echo "Hello, PHP!"; ?>
What you’ll learn:
How PHP works on the server
Running PHP in your browser
Basic syntax and echo statement
Day 2: Variables, Data Types & Constants
Dive into PHP variables and data types:
$name = "John"; $age = 25; $is_student = true;
Key concepts:
Variable declaration and naming
Data types: String, Integer, Float, Boolean, Array
Constants and predefined variables ($_SERVER, $_GET, $_POST)
Day 3: Operators, Conditions & Control Flow
Learn how to make decisions in PHP:
if ($age > 18) { echo "You are an adult."; } else { echo "You are underage."; }
Topics covered:
Arithmetic, comparison, and logical operators
If-else, switch-case
Nesting conditions and best practices
Day 4: Loops and Arrays
Understand loops to perform repetitive tasks:
$fruits = ["Apple", "Banana", "Cherry"]; foreach ($fruits as $fruit) { echo $fruit. "<br>"; }
Learn about:
for, while, do...while, and foreach loops
Arrays: indexed, associative, and multidimensional
Array functions (count(), array_push(), etc.)
Day 5: Functions & Form Handling
Start writing reusable code and learn how to process user input from forms:
function greet($name) { return "Hello, $name!"; }
Skills you gain:
Defining and calling functions
Passing parameters and returning values
Handling HTML form data with $_POST and $_GET
Form validation and basic security tips
Day 6: Working with Files & Sessions
Build applications that remember users and work with files:
session_start(); $_SESSION["username"] = "admin";
Topics included:
File handling (fopen, fwrite, fread, etc.)
Reading and writing text files
Sessions and cookies
Login system basics using session variables
Day 7: PHP & MySQL – Database Connectivity
On the final day, you’ll connect PHP to a database and build a mini CRUD app:
$conn = new mysqli("localhost", "root", "", "mydatabase");
Learn how to:
Connect PHP to a MySQL database
Create and execute SQL queries
Insert, read, update, and delete (CRUD operations)
Display database data in HTML tables
Bonus Tips for Mastering PHP
Practice by building mini-projects (login form, guest book, blog)
Read official documentation at php.net
Use tools like phpMyAdmin to manage databases visually
Try MVC frameworks like Laravel or CodeIgniter once you're confident with core PHP
What You’ll Be Able to Build After This PHP Tutorial
After following this 7-day PHP tutorial, you’ll be able to:
Create dynamic web pages
Handle form submissions
Work with databases
Manage sessions and users
Understand the logic behind content management systems (CMS)
This gives you the foundation to become a full-stack developer, or even specialize in backend development using PHP and MySQL.
Final Thoughts
Learning PHP doesn’t have to be difficult or time-consuming. With the Complete PHP Tutorial: Learn PHP from Scratch in 7 Days, you’re taking a focused, structured path toward web development success. You’ll learn all the core concepts through clear explanations and hands-on examples that prepare you for real-world projects.
Whether you’re a student, freelancer, or aspiring developer, PHP remains a powerful and valuable skill to add to your web development toolkit.
So open up your code editor, start typing your first <?php ... ?> block, and begin your journey to building dynamic, powerful web applications — one day at a time.

0 notes
Text

How to Set Up Your Local Development Environment for WordPress
Setting up a local development environment is one of the best ways to experiment with and build WordPress websites efficiently. It offers you a safe space to test themes, plugins, and updates before applying changes to a live site. Whether you’re a beginner or an experienced developer, having a local environment is essential in streamlining your workflow and minimizing website downtime.
Before we dive into the technical steps, it’s worth mentioning the benefits of WordPress for your business website. WordPress offers unmatched flexibility, scalability, and user-friendliness, making it an ideal platform for businesses of all sizes. When paired with a solid local development setup, WordPress becomes even more powerful in enabling fast and secure site builds.
Step 1: Choose Your Local Development Tool
There are several local development tools available that cater specifically to WordPress users:
Local by Flywheel (now Local WP): Extremely beginner-friendly with features like SSL support and one-click WordPress installs.
XAMPP: A more general-purpose tool offering Apache, MySQL, PHP, and Perl support.
MAMP: Ideal for macOS users.
DevKinsta: Built by Kinsta, it offers seamless WordPress development and staging capabilities.
Choose the one that suits your OS and comfort level.
Step 2: Install WordPress Locally
Once you’ve chosen your tool:
Install the software and launch it.
Create a new WordPress site through the interface.
Set up your site name, username, password, and email.
After setup, you’ll get access to your WordPress dashboard locally, allowing you to install themes, plugins, and begin your customizations.
Step 3: Configure Your Development Environment
To ensure an efficient workflow, consider these configurations:
Enable Debug Mode: Helps in identifying PHP errors.
Use Version Control (e.g., Git): Keeps your changes tracked and manageable.
Database Access: Tools like phpMyAdmin help manage your WordPress database locally.
If your project requires dynamic functionality, leveraging PHP Development Services during the setup phase can ensure custom features are implemented correctly from the beginning.
Step 4: Customize Themes and Plugins Safely
With your local environment set up, now's the time to begin theme development or customization. You can safely create or modify a child theme, experiment with new plugins, and write custom code without any risk of affecting your live site.
For those unfamiliar with theme structures or WordPress standards, it’s often wise to hire a professional WordPress developer who understands best practices and can ensure clean, maintainable code.
Step 5: Syncing to a Live Server
After building and testing your site locally, you'll eventually want to push it live. Popular methods include:
Using a plugin like Duplicator or All-in-One WP Migration
Manual migration via FTP and phpMyAdmin
Using version-controlled deployment tools
Syncing should always be done carefully to avoid overwriting crucial data. Regular backups and testing are essential.
Step 6: Maintain Your WordPress Site Post-Launch
Launching your website is only the beginning. Ongoing updates, security patches, and performance optimization are critical for long-term success. Enlisting website maintenance services ensures your site remains fast, secure, and up-to-date.
Services can include:
Core, plugin, and theme updates
Malware scans and security hardening
Site performance monitoring
Regular backups
Final Thoughts
A local WordPress development environment not only speeds up your development process but also protects your live website from unintended changes and errors. With tools and strategies now more accessible than ever, there's no reason not to use one.From learning the basics to running advanced builds, setting up locally gives you the confidence and space to grow your WordPress skills. And if you want to see real-world examples or follow along with tips and tricks I share, feel free to check out my work on Instagram for practical inspiration.
0 notes
Video
youtube
The ABSOLUTE BEST Way to Install WordPress on XAMPP in 8 Minutes
🎥📢 Want to set up WordPress on your own computer? Then this video is for you! 💻🔥
In this tutorial, I’ve shown how to easily install WordPress on localhost using XAMPP. Start practicing web development from the comfort of your home! 🚀
👇 Watch the video now and don’t forget to share!
1 note
·
View note
Text
Set Up WordPress Locally Using XAMPP on Windows 11
This article explains how to install WordPress locally with XAMPP on Windows 11. XAMPP is a free and open-source cross-platform web server solution stack package developed by Apache Friends. It consists primarily of the Apache HTTP Server, MariaDB, and interpreters for scripts written in the PHP and Perl programming languages. You can install XAMPP on Windows or Ubuntu to run PHP apps locally…
0 notes
Text
How to Install WordPress Locally on Your MacBook (Easy Guide)
🚀 Exciting news for all you WordPress developers and enthusiasts! 🎉 Just published a new blog post on how to easily install WordPress locally on your MacBook! 💻 Perfect for testing themes, plugins, and building websites offline. No more messing with live servers! 🙌 This step-by-step guide walks you through the entire process, making it super simple even for beginners. Whether you're using MAMP, XAMPP, or another local development environment, this tutorial has you covered. 🤓 Check it out now and start building your WordPress projects locally! 👇 #WordPress #LocalDevelopment #MacBook #Installation #Tutorial #WebDev #MAMP #XAMPP #Localhost #PHP #MySQL #WordPressTutorial #WebDevelopment #Coding #Tech #BlogPost #NewBlog #LearnToCode #RTFM #100DaysOfRTFM #Innovation #Technology #Creativity #LocalWP #SoftwareDevelopment #DigitalStrategy #DigitalMarketing
So, you’re ready to dive into the world of WordPress development, but you don’t want to mess with a live server just yet? Great idea! Setting up WordPress locally on your MacBook is the perfect way to experiment, test themes and plugins, and build your website in a safe environment. This guide will walk you through the process step-by-step. Why Install WordPress Locally? Before we jump in, let’s…
#Installation#Local Development#Localhost#MacBook#MAMP#MySQL#PHP#Tutorial#Web Development#WordPress#XAMPP
0 notes
Text
How to Install XAMPP for Windows 10 - XAMPP WordPress For Beginners
To install XAMPP on Windows 10 and set it up for WordPress, follow these steps:
Step 1: Download XAMPP
Go to the official XAMPP website.
Click on the "XAMPP for Windows" button.
Once the installer is downloaded, locate the .exe file (usually in the Downloads folder).
Step 2: Install XAMPP
Double-click the .exe file to start the installation process.
Choose the components you want to install. For WordPress, you need at least Apache, MySQL, and PHP. These are selected by default, so you can leave them as is.
Choose the installation folder (default is usually fine).
Click "Next" and follow the prompts.
During installation, the installer may ask if you want to start the XAMPP Control Panel. Leave it checked and click "Finish."
Step 3: Start Apache and MySQL
Open the XAMPP Control Panel (it should have opened automatically, or you can search for it in the Start menu).
Click the "Start" button next to Apache (this will run the web server).
Click the "Start" button next to MySQL (this will start the database server).
Make sure both Apache and MySQL show "Running" in green.
Step 4: Install WordPress
Download the latest version of WordPress from the official WordPress website.
Extract the WordPress ZIP file.
Move the extracted folder (the WordPress folder) into the htdocs folder of your XAMPP installation (usually located at C:\xampp\htdocs).
Step 5: Create a Database for WordPress
Open your browser and go to http://localhost/phpmyadmin/.
In the phpMyAdmin dashboard, click on "Databases."
Create a new database for WordPress. Give it a name (e.g., wordpress_db) and click "Create."
Step 6: Configure WordPress
Open your browser and go to http://localhost/wordpress (or the folder name you chose).
The WordPress installation screen should appear.
Select your language and click "Continue."
On the next screen, enter your database details:
Database Name: The name you created (e.g., wordpress_db).
Username: root (default for XAMPP).
Password: Leave this blank (default for XAMPP).
Database Host: localhost (default).
Table Prefix: Leave as wp_ unless you want to change it.
Click Submit and then Run the Install.
Step 7: Complete the WordPress Setup
Fill in the site details (site title, admin username, password, and email).
Click "Install WordPress."
Once the installation is complete, you’ll see a success message. You can now log in to your WordPress dashboard at http://localhost/wordpress/wp-admin.
Final Notes
To stop your server, go to the XAMPP Control Panel and click "Stop" for Apache and MySQL.
If you need to make your local WordPress site public, you'll have to configure port forwarding or use a tool like Local by Flywheel or XAMPP for public access.
#installxampp#xamppforbeginners#xamppwindows10#wordpressinstallation#localserversetup#runwordpresslocally#xamppwordpress#webdevelopment#phpdevelopment#wordpressforbeginners#tutorial2025#localwordpress#xamppsetup#installingwordpress#wordpresssetup#beginnerfriendly#xamppguide#developmenttutorial#learnwordpress#wordpresslocally
0 notes
Text
How to Move Your WordPress Site from Localhost to a Live Server
Developing a WordPress site on localhost is a great way to build and test your website in a controlled environment. However, the real challenge arises when it's time to move the site from your local server to a live hosting environment. If not done correctly, you could encounter broken links, missing images, or even database errors.
In this blog, we'll guide you through a step-by-step process to successfully move your WordPress site from localhost to a live server.

Step 1: Choose the Right Hosting Provider
Your first step is to select a reliable web hosting provider that meets your website’s needs. Look for:
Server Speed: Fast servers for better performance.
Uptime Guarantee: At least 99.9% uptime to ensure availability.
Ease of Use: User-friendly dashboards and tools.
WordPress Support: Hosting optimized for WordPress websites.
Popular options include Bluehost, SiteGround, and WP Engine.
Step 2: Export Your Local WordPress Database
The database is the backbone of your WordPress site. To export it:
Open phpMyAdmin on your local server (e.g., XAMPP or WAMP).
Select your WordPress database.
Click on the Export tab and choose the Quick Export method.
Save the .sql file to your computer.
Step 3: Upload Your WordPress Files to the Live Server
To move your files:
Compress Your WordPress Folder: Zip your local WordPress installation folder.
Access Your Hosting Account: Use a file manager or an FTP client like FileZilla.
Upload the Files: Transfer the zipped folder to your hosting server's root directory (usually public_html).
Unzip the Folder: Extract the files once uploaded.
Step 4: Create a Database on the Live Server
Now, set up a new database on your live hosting server:
Log in to your hosting control panel (e.g., cPanel).
Navigate to the MySQL Databases section.
Create a new database, database user, and password.
Assign the user to the database with full privileges.
Step 5: Import the Database to the Live Server
Open phpMyAdmin in your hosting control panel.
Select the new database you created.
Click the Import tab.
Choose the .sql file you exported from your localhost.
Click Go to import the database.
Step 6: Update the wp-config.php File
To connect your site to the live database:
Locate the wp-config.php file in your WordPress installation.
Open the file in a text editor.
Update the following lines: define('DB_NAME', 'your_live_database_name'); define('DB_USER', 'your_live_database_user'); define('DB_PASSWORD', 'your_live_database_password'); define('DB_HOST', 'localhost'); // Keep this unless your host specifies otherwise.
Save the file and upload it to your server via FTP.
Step 7: Update URLs in the Database
Your localhost URLs need to be replaced with your live site URLs.
Use a tool like Search Replace DB or run SQL queries in phpMyAdmin.
In phpMyAdmin, run the following query: UPDATE wp_options SET option_value = 'http://your-live-site.com' WHERE option_name = 'siteurl'; UPDATE wp_options SET option_value = 'http://your-live-site.com' WHERE option_name = 'home';
Step 8: Test Your Live Website
Once everything is uploaded and configured, check your website by entering its URL in a browser. Test for:
Broken Links: Fix them using plugins like Broken Link Checker.
Missing Images: Ensure media files were uploaded correctly.
Functionality: Verify forms, buttons, and features work as expected.
Step 9: Set Up Permalinks
To ensure proper URL structure:
Log in to your WordPress admin dashboard on the live site.
Go to Settings > Permalinks.
Choose your preferred permalink structure and click Save Changes.
Step 10: Secure Your Live Website
After migrating, secure your site to prevent vulnerabilities:
Install an SSL Certificate: Most hosting providers offer free SSL certificates.
Update Plugins and Themes: Ensure everything is up to date.
Set Up Backups: Use plugins like UpdraftPlus for regular backups.
Conclusion
Moving your WordPress site from localhost to a live server may seem daunting, but by following these steps, you can ensure a smooth and error-free migration. A successful move allows you to showcase your site to the world, engage your audience, and achieve your goals.
Start today and take your WordPress project live with confidence!
0 notes
Text
A Comprehensive Guide to WordPress Development with Examples
WordPress is the most popular content management system (CMS) globally, powering over 40% of websites on the internet. Whether you’re a beginner or a seasoned developer, WordPress offers unparalleled flexibility and scalability, making it the go-to platform for websites ranging from personal blogs to large-scale e-commerce stores. This blog will guide you through the fundamentals of WordPress development with practical examples.
Why Choose WordPress for Web Development?
WordPress is an excellent choice for web development due to its versatility, user-friendliness, and extensive ecosystem. Here are key reasons to choose WordPress:
Ease of Use: The intuitive interface makes it accessible for users with no coding experience.

Customizability: Thousands of themes and plugins allow developers to create unique, feature-rich websites.

SEO-Friendly: Built-in SEO tools and plugins like Yoast SEO ensure higher search engine rankings.
Community Support: A vast community of developers and users provides extensive documentation and troubleshooting help.
Cost-Effective: It’s open-source, reducing upfront costs, and many plugins and themes are free or affordable.
Scalability: Suitable for all project sizes, from small blogs to enterprise-level applications.
Most Common and Popular Uses of WordPress Development
WordPress is a versatile platform that supports a wide range of applications:
Blogs and Personal Websites: Ideal for bloggers and content creators to share ideas and stories.
E-Commerce Websites: Plugins like WooCommerce transform WordPress into a robust online store.
Business Websites: Professional websites for showcasing services, portfolios, and client testimonials.
Educational Platforms: Create e-learning websites with plugins like LearnDash or Tutor LMS.
Membership Sites: Restrict access to exclusive content using membership plugins.
News Portals and Magazines: Build dynamic websites with features like category filtering and custom layouts.
Portfolio Websites: Showcase creative work with visually appealing themes tailored for portfolios.
Click Here To Explore Your Knowledge About Wordpress Development
Key Components of WordPress Development
Themes:
Control the appearance and layout of a WordPress site.
2. Plugins:
Extend the functionality of WordPress.
3. Widgets and Shortcodes:
Widgets enhance the sidebar or footer.
Shortcodes embed custom functionality directly into posts or pages.
4. APIs:
WordPress REST API allows developers to interact with WordPress using JSON.
Benefits of WordPress Development

Flexibility: WordPress can support any type of website, from a simple blog to a full-fledged e-commerce site.
2. Extensive Plugin Ecosystem: With over 50,000 plugins, developers can add virtually any feature to a site.
3. Mobile-Responsive: Most WordPress themes are mobile-friendly, ensuring a seamless experience across devices.
4. Easy Maintenance: Regular updates to themes, plugins, and the core WordPress software ensure stability and security.
5. Large Community: Access to thousands of tutorials, forums, and resources for problem-solving and inspiration.
6. Integration Capabilities: Easily integrate with social media platforms, email marketing tools, and payment gateways.
Steps to Start WordPress Development
Set Up a Local Development Environment:
Use tools like XAMPP, MAMP, or Local by Flywheel.
Install WordPress locally and configure your database.
2. Learn the Basics of PHP, HTML, CSS, and JavaScript:
WordPress is built on PHP, with front-end elements using HTML, CSS, and JavaScript.
3. Understand WordPress Hierarchy:
Learn how templates like header.php, footer.php, and single.php work.
4. Work with the WordPress Codex:
The Codex provides extensive documentation for developers.
5. Experiment with Themes and Plugins:
Start by customizing existing themes and writing simple plugins.
Tips for Successful WordPress Development
Follow Best Practices: Use coding standards to ensure maintainable and secure code.
Leverage Child Themes: Avoid directly modifying core themes by using child themes.
Optimize Performance: Use caching plugins and optimize images for faster load times.
Secure Your Website: Implement SSL, regular updates, and strong authentication measures.
Conclusion
WordPress development offers endless possibilities for creating dynamic, feature-rich websites. By mastering its core components, leveraging its powerful APIs, and experimenting with customizations, you can develop applications tailored to diverse business needs. Start small, build your expertise, and soon you’ll be crafting WordPress solutions that stand out in today’s competitive digital landscape.
0 notes
Text
How to Be a Successful WordPress Designer
Becoming a successful WordPress designer is a great goal. WordPress is a popular tool for building websites. It’s used by millions of people around the world. If you want to design websites using WordPress, this guide will help you get started and succeed.
1. Learn the Basics of WordPress
First, you need to understand how WordPress works. WordPress is a platform that allows you to create and manage websites easily. It has many features that make it a powerful tool for web design.
To learn the basics, start by exploring the WordPress dashboard. The dashboard is where you will manage your website. Learn how to create pages, posts, and menus. Also, learn how to install themes and plugins. Themes change how your website looks, while plugins add new features.
2. Practice Design Skills
Design is more than just making things look nice. It’s about making things easy to use. When you design a website, think about how visitors will use it. Make sure your design is simple and easy to navigate.
Practice your design skills by creating websites for fun. Try different themes and layouts. Experiment with colors, fonts, and images. The more you practice, the better you will become.
3. Learn HTML and CSS
HTML and CSS are the building blocks of web design. HTML is the code that makes up the structure of a webpage. CSS is the code that controls how the webpage looks.
While you can use WordPress without knowing HTML and CSS, learning these languages will make you a better designer. You will be able to customize your websites more and solve problems faster.
There are many free resources online to learn HTML and CSS. Spend some time each week learning and practicing these skills.
4. Choose the Right Tools
As a WordPress designer, you will need some tools to help you work efficiently. Some of these tools include:
A good text editor: This is where you will write your HTML, CSS, and other code. Examples include Notepad++, Sublime Text, or Visual Studio Code.
Graphic design software: This is for creating and editing images. Examples include Adobe Photoshop, GIMP, or Canva.
A local development environment: This is where you can build and test your websites before making them live. Examples include XAMPP, WAMP, or Local by Flywheel.
Using the right tools will help you work faster and create better designs.
5. Build a Portfolio
Your portfolio is a collection of your best work. It shows potential clients what you can do. Start by creating a few websites for yourself, friends, or local businesses. As you gain experience, add your best projects to your portfolio.
Make sure your portfolio is easy to navigate and showcases your skills. Include a variety of projects to show that you can handle different types of design work.
6. Keep Learning
Web design is always changing. New tools, trends, and technologies come out all the time. To be successful, you need to keep learning.
Follow web design blogs, take online courses, and attend workshops. Learn about the latest design trends and how to use new tools. The more you learn, the more valuable you will become as a designer.
7. Network with Others
Networking is important in any field, and web design is no different. Join online communities of WordPress designers. Attend local meetups or web design conferences.
Networking can help you learn from others, find new clients, and stay motivated. Don’t be afraid to ask questions or share your knowledge with others.
8. Offer Great Customer Service
To be successful, you need to do more than just design great websites. You also need to offer great customer service. Be polite and professional when communicating with clients. Listen to their needs and make sure they are happy with your work.
Happy clients are more likely to recommend you to others. This can help you build a successful business as a WordPress designer.You can create your website s from Kiiweb Digital Solutions
Conclusion
Becoming a successful WordPress designer takes time and effort. Start by learning the basics, practicing your design skills, and learning HTML and CSS. Use the right tools, build a strong portfolio, and keep learning. Network with others and offer great customer service. If you follow these steps, you will be on your way to success.
1 note
·
View note
Text
Transforming Designs: How to Convert Figma to WordPress Effectively
In the dynamic world of web development, transforming a meticulously crafted design into a functional website is both an art and a science. Figma, a robust design tool, is increasingly becoming the go-to for web designers due to its collaborative features and versatility. However, converting Figma designs into a WordPress site can be a daunting task if you're not well-versed in the process. This blog aims to demystify the conversion process and provide a clear roadmap for developers and designers alike.

Why Choose WordPress for Your Website?
Before diving into the conversion process, it’s essential to understand why WordPress is the platform of choice for many developers. WordPress powers over 40% of all websites on the internet, thanks to its flexibility, scalability, and user-friendly interface. Custom WordPress development allows for the creation of unique, feature-rich websites that cater to specific business needs.
Benefits of Converting Figma Designs to WordPress
Visual Precision: Figma’s vector-based design system ensures that your website looks exactly as you envisioned it.
Collaboration: Figma’s collaborative tools allow designers and developers to work together seamlessly, ensuring that the final product aligns with the initial design.
Efficiency: Converting designs from Figma to WordPress can streamline the development process, saving time and reducing errors.
Step-by-Step Guide to Convert Figma to WordPress
Step 1: Prepare Your Figma Design
Organize Layers: Ensure that your Figma design is well-organized with named layers and groups. This will make the development process smoother.
Responsive Design: Check that your design is responsive, meaning it will look good on various devices and screen sizes.
Step 2: Export Assets from Figma
Images and Icons: Export all images, icons, and other graphical elements from Figma. Ensure they are in the correct formats (e.g., PNG, SVG) and resolutions.
CSS and Styles: Use Figma’s built-in tools to extract CSS styles for text, buttons, and other elements.
Step 3: Set Up Your WordPress Environment
Local Development Environment: Set up a local development environment using tools like XAMPP, WAMP, or Local by Flywheel.
Install WordPress: Download and install the latest version of WordPress on your local environment.
Step 4: Develop the WordPress Theme
HTML and CSS: Create HTML and CSS files based on your Figma design. Start with a basic HTML structure and gradually add styles.
Theme Structure: Follow the WordPress theme hierarchy to create essential files like header.php, footer.php, index.php, style.css, and functions.php.
Template Files: Use WordPress template files to define different parts of your site, such as the homepage, single posts, and pages.
Step 5: Implement Functionality
Custom Post Types: Define custom post types in functions.php if your site requires specific content types.
Advanced Custom Fields (ACF): Use the ACF plugin to create custom fields and add more flexibility to your content management.
Plugins: Install necessary plugins to add functionality like SEO, security, and performance optimization.
Step 6: Test and Optimize
Cross-Browser Testing: Ensure your site works well across different browsers and devices.
Performance Optimization: Optimize images, minify CSS and JavaScript files, and leverage caching to improve site performance.
SEO: Implement SEO best practices, including meta tags, alt texts for images, and a clean URL structure.
Common Challenges and Solutions
Responsive Design Issues: Use media queries in CSS to ensure that your site looks good on all devices.
Alignment and Spacing: Pay close attention to the spacing and alignment of elements to ensure they match your Figma design.
Complex Animations: Use CSS and JavaScript libraries like Animate.css or GSAP to recreate complex animations.
Tools and Plugins to Facilitate the Conversion
Figma to HTML Tools: Tools like Anima or Figma2HTML can automate parts of the conversion process.
WordPress Page Builders: Elementor or Beaver Builder can help you build complex layouts without extensive coding.
Theme Frameworks: Use frameworks like Genesis or Underscores to speed up theme development.
Conclusion
Converting Figma designs to WordPress involves a combination of design precision and coding expertise. By following the steps outlined above, you can ensure a smooth and efficient conversion process, resulting in a stunning, fully functional WordPress website. Whether you’re a designer looking to bring your vision to life or a developer aiming to streamline your workflow, mastering the Figma to WordPress conversion process is an invaluable skill in the realm of custom WordPress development.
0 notes
Text
Joomla 4 installation on Localhost
This is Joomla 4 Installation and setup on Windows 10. You will learn how you can install Joomla Latest version 4.0.2 in localhost XAMPP. To install Joomla 4 you need PHP version 7.4+ and MySQL version 5.6+ if you have any issue with the installation or any other please comment, and I will try to help you.
youtube
View On WordPress
#how to install joomla#how to install joomla 4 in window 10#How to install joomla in localhost using xampp#how to install joomla in xampp#how to install joomla in xampp step by step#how to install joomla on windows 10#how to install joomla template on localhost#joomla 3 10 download#joomla 4#joomla 4 beta 8#Joomla 4 installations#joomla 4 templates#joomla overview#joomla review#JoomTech Solutions#Youtube
0 notes
Text
WordPress plugin development to transform your site
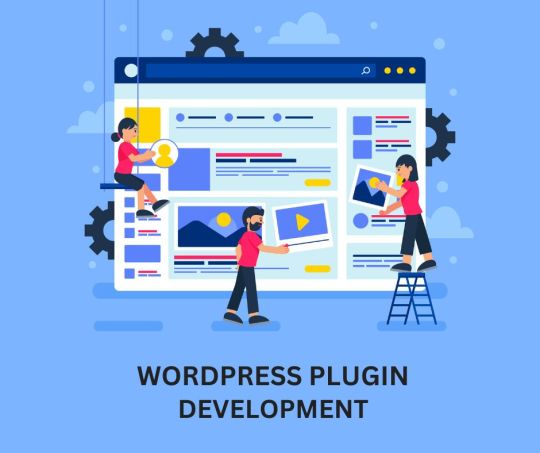
WordPress, a leading content management system, owes much of its versatility to plugins. But what exactly are WordPress plugins? In simple terms, plugins are small pieces of software that extend the functionality of a WordPress website. Think of them as add-ons or modules that you can install to enhance your site's features and capabilities.
Plugins empower WordPress users to add a wide range of functionalities to their websites without needing to write complex code from scratch. Whether you want to integrate a contact form, optimize your site for search engines, or create an online store, there's likely a plugin available to help you achieve your goal.
These plugins are developed by a diverse community of developers, ranging from hobbyists to professional software engineers. They are typically distributed through the official WordPress Plugin Development or third-party marketplaces.
Now that we've covered what WordPress plugins are, let's explore how they're developed and how you can get started creating your own plugins to customize your WordPress site further.
In the expansive world of WordPress, plugins are essential tools for enhancing the functionality of your website. Whether you're just starting or have some coding experience, understanding how to create WordPress plugins can greatly benefit you. This guide will walk you through the basics of WordPress plugin development in simple language, covering all the essential topics you need to know.
What Are WordPress Plugins?
WordPress plugins are like add-ons or extensions for your website. They allow you to add new features or modify existing ones without changing the core WordPress software. For example, you can install plugins to create contact forms, add social media sharing buttons, or optimize your site for search engines.
Why Develop Custom Plugins?
While thousands of free and paid plugins are available, sometimes you need a custom solution tailored to your specific needs. Developing your plugin gives you full control over its functionality and ensures it integrates seamlessly with your website.
Getting Started: Setting Up Your Development Environment
To begin developing WordPress plugins, you'll need a local development environment where you can test your code without affecting your live website. You can set this up using tools like XAMPP or MAMP, which allow you to run a web server on your computer. Once set up, you can install WordPress locally and start coding.
Understanding Hooks and Filters
Hooks and filters are essential concepts in WordPress plugin development. Hooks allow you to execute your code at specific points in the WordPress execution process, while filters allow you to modify data before it is displayed on the website.
Adding Functionality: Advanced Features
As you become more comfortable with plugin development, you can start adding more advanced features to your plugins. This may include creating custom post types and taxonomies, implementing shortcode functionality for inserting dynamic content or using AJAX for asynchronous interactions without page reloads.
Designing the User Interface
Creating an intuitive user interface for your plugin is important for a positive user experience. You can design custom admin pages using WordPress APIs and add settings sections for configuring your plugin. Making sure your plugin is compatible with various WordPress themes and plugins is also crucial.
Security Best Practices
Security should always be a top priority when developing WordPress plugins. Make sure to sanitize and validate user input to prevent security vulnerabilities like SQL injection or cross-site scripting (XSS). Implement proper authorization and authentication mechanisms to protect sensitive data.
Testing and Debugging Your Plugin
Before releasing your plugin to the public, it's essential to thoroughly test and debug it to ensure it works as expected. You can use tools like PHPUnit for unit testing and built-in WordPress functions for debugging. Logging and error handling are also useful for diagnosing issues effectively.
Publishing Your Plugin
Once your plugin is ready, you can publish it to the WordPress Plugin Directory for others to use. Make sure to write clear documentation and a readme file explaining how to use your plugin. Promoting your plugin through social media and engaging with the WordPress community can increase its visibility.
In conclusion,
learning how to develop WordPress plugins opens up a world of possibilities for customizing and extending your website's functionality. With practice and dedication, you can create plugins that enhance the user experience and make your website stand out. If you're looking for professional guidance and support in WordPress plugin development, consider contacting Shri Krishna Technologies. Their experienced team can help you take your WordPress projects to the next level.
#WordPressPluginDevelopmentcompany#WordPressDevelopmentCompany#ProfessionalWordPressPluginDevelopmentCompany#WordPressdevelopment#Websitedesignanddevelopment#WordPressPlugindevelopment
0 notes
Text
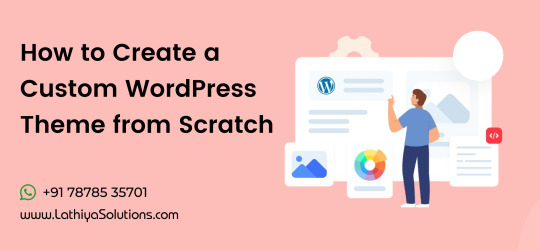
How to Create a Custom WordPress Theme from Scratch
Creating a custom WordPress theme from scratch can be an exciting yet challenging task for anyone looking to build a unique website. WordPress is known for its flexibility and ease of use, but when you want to create something truly unique, a custom theme is the best way to go. Whether you're a developer looking to expand your skills or a business aiming for a tailor-made site, understanding the basics of WordPress theme creation is essential.
With the right knowledge and tools, you can design a theme that fits your brand perfectly and provides an excellent user experience. In this guide, we’ll walk you through the steps of creating a custom WordPress theme and the best practices for doing so.
Step 1: Set Up a Local Development Environment
Before you start building your custom theme, you’ll need to set up a local development environment. This is where you can work on your site without the fear of breaking your live site. There are several tools available to help you with this, such as Local by Flywheel and XAMPP, which allow you to install WordPress locally and begin working on your theme in a safe environment.
By setting up a local environment, you can test your custom WordPress theme design before making it live, ensuring that everything works as expected. This step is crucial, especially for those who want to hire WordPress developers who are capable of setting up efficient, professional environments for theme development.
Step 2: Create the Basic Structure of Your Theme
A WordPress theme is made up of a combination of files that control the structure, style, and functionality of the site. At a minimum, you’ll need the following files:
style.css: This file holds the theme’s CSS (Cascading Style Sheets) and the metadata of the theme, such as the theme name, version, and description.
index.php: The main template file that loads the WordPress loop and displays posts or pages.
functions.php: A critical file that allows you to add custom functionality to your theme. This can include custom menus, post types, and even custom shortcodes.
header.php: This file contains the header section of the website, including links to stylesheets and scripts.
footer.php: This is the section of the theme that holds the footer content, including any important links or widgets.
By customizing these files, you can build a theme that meets your exact needs. This is where the flexibility of WordPress comes into play. You can choose to create a custom WordPress theme for your site from scratch, which gives you full control over how your website looks and functions.
Step 3: Style Your Theme Using CSS and Media Queries
Once you’ve created the basic structure, it’s time to focus on styling. Use CSS to style your theme and make it visually appealing. For responsive design, consider using media queries to ensure your theme looks great on all screen sizes.
Custom stylesheets give you full control over how your theme will appear on desktops, tablets, and mobile devices. By using a custom WordPress theme design, you can ensure that your site looks polished and matches your branding. If you’re not familiar with CSS or responsive design principles, it might be beneficial to hire a WordPress developer who can efficiently style your theme to your specifications.
Step 4: Add Functionality with WordPress Template Tags and Functions
Template tags are the foundation of WordPress themes and allow you to display dynamic content. Functions like the_content(), the_title(), and wp_nav_menu() are commonly used to display posts, titles, and navigation menus.
In addition to the built-in WordPress functionality, you can add custom functionality in your theme’s functions.php file. For example, you could create a custom widget, post type, or shortcode to enhance the theme’s capabilities. Customizing this functionality will help your theme stand out from the crowd.
Step 5: Test Your Theme
Testing is an essential part of the theme development process. Once you’ve built your custom WordPress theme, you should thoroughly test it to ensure everything works correctly. Check your theme on different devices and browsers to ensure compatibility. Use browser developer tools to inspect your site’s elements and ensure everything is responsive.
This is the stage where you can check if your theme adheres to WordPress best practices and performance guidelines. It’s also essential to make sure your theme works well with various plugins. WordPress website maintenance services can be helpful during this stage to ensure your theme is optimized and fully functional before it’s made live.
Step 6: Deploy Your Theme
After you’ve thoroughly tested your theme and are happy with the results, it’s time to make it live. You can upload your theme to your WordPress site through the WordPress dashboard or by using an FTP client. Once uploaded, activate your theme and start configuring it to match your site’s content and layout.
For many users, this is where they may consider hiring a WordPress theme developer to finalize their customizations or add advanced features that they may not be comfortable doing themselves. Whether it’s optimizing your theme’s performance or adding custom functionality, a developer can help you ensure that your theme is ready for prime time.
Conclusion
Creating a custom WordPress theme from scratch can be a rewarding experience. By following these steps, you’ll be able to build a theme that meets your unique needs and offers a great user experience. Whether you're developing your theme yourself or opting to hire a WordPress developer for assistance, the process is straightforward when you follow best practices.Remember, designing and developing a custom theme is just the beginning. If you need ongoing support, make sure to take WordPress website maintenance services to ensure your theme is up-to-date and continues to run smoothly. This ongoing support will help you stay ahead in the ever-evolving world of WordPress.
0 notes
Text
Mastering the Art of WordPress Web Development: A Comprehensive Guide
Introduction:
In the ever-evolving landscape of web development, WordPress has emerged as a powerhouse, empowering millions of websites across the globe. Its user-friendly interface, flexibility, and extensive plugin ecosystem make it an ideal choice for both beginners and seasoned developers. In this comprehensive guide, we will delve into the world of WordPress web development, exploring the essential aspects, best practices, and advanced techniques to help you harness the full potential of this versatile platform.
Section 1: The Foundation of WordPress Web Development
WordPress at its core is a content management system (CMS) built on PHP and MySQL. Understanding the foundational elements is crucial for any web developer. We'll explore the basics of WordPress architecture, file structure, and database management to provide you with a solid foundation for your development journey.
Section 2: Setting Up Your Development Environment
Before diving into WordPress web development, it's essential to establish a conducive environment. Learn the step-by-step process of setting up a local development environment, exploring tools like XAMPP or MAMP, and understanding version control systems such as Git for efficient collaboration and code management.
Section 3: Themes and Templates
Themes are the visual backbone of a WordPress site, and mastering them is key to creating stunning and responsive designs. Uncover the intricacies of theme development, from customizing existing themes to building your own from scratch. Dive into the world of template files, hierarchy, and the powerful Template Hierarchy system.
Section 4: Plugins and Functionality
Extend the functionality of your WordPress site with plugins. Learn how to choose, install, and customize plugins to add features like SEO optimization, e-commerce capabilities, and social media integration. Understand the principles of hooking and filtering to tailor plugins to your specific needs.
Section 5: Advanced Techniques and Best Practices
Take your WordPress web development skills to the next level by exploring advanced techniques and industry best practices. From optimizing performance and security to implementing custom post types and taxonomies, this section covers the finer details that elevate your projects from good to exceptional.
Section 6: Responsive Design and Accessibility
In the era of diverse devices and users, ensuring your WordPress site is responsive and accessible is paramount. Explore responsive design principles and accessibility standards, enabling you to create websites that provide a seamless experience for all users, regardless of their device or abilities.
Conclusion:
WordPress web development is a dynamic and rewarding journey. By mastering the fundamental concepts, exploring advanced techniques, and adhering to best practices, you can create websites that stand out in the digital landscape. This comprehensive guide serves as your roadmap, empowering you to navigate the world of WordPress web development with confidence and creativity.
0 notes